It’s mid-January as I write this. Seemingly recovered from the hangover of the holidays. Except, this year the consumption was not due to the excesses of whiskeys and sweet liqueurs, but instead of rubber cement and Modge Podge. At one point, my apartment seemed like Santa’s workshop gone awry. Piles of ribbons and bows, boxes, card stock and ceramic tiles. Yes, tiles.
I came across this lovely idea at: http://www.stylemepretty.com/2009/03/30/diy-coasters and I thought that in these days of “economical downturn” it would be the perfect gift for friends and family. Creative, useful and most of all inexpensive. At less than $1.00 per set, they make great gifts. Or, as the original link implies, wedding or party favors. As my boyfriend noted, coasters are one of those things that many people don’t buy for themselves, yet everyone can use.
It was an arduous process; At times I thought I was giving myself brain damage from the fumes of the glue as I tried desperately to adhere the cork board to the edges of the tile. Along the way, I learned that you can save yourself a ton of aggravation and time by using the self adhesive cork liner found in the cabinet section of your local home improvement store. The kicker was that it was my boyfriend (of course) who had accidentally found it. Three weeks into my “war on glue”, I was inhaling rubber cement and a host of other toxic adhesives, when he returned home with a sheet of cork-board, that while flimsier and thinner that the others, was completely self adhesive. Ahhh. . . the heavens open as angels sing joyous songs of celebration. It figures, my haphazard messiah shrugged off his seemingly miraculous solution to my vexing problem of adhesion in the world of Christmas crafting with a simple, “It’s all I could find”.
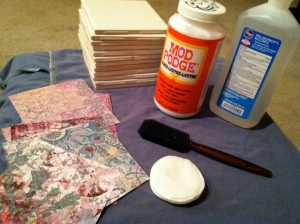
For this project, you will need:
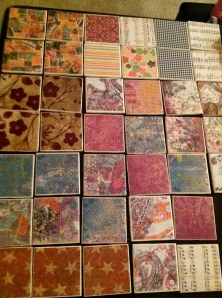
1. Space. Depending on if your making four or forty; these little guys take a while to dry and require several layers of glue and varnish.
2. Time. Most of the work can be done from the comfort of the couch, while watching movies (or in my case, two seasons of Ancient Aliens). However, you must allow each layer to dry completely before starting the next. So, plan accordingly and do not stack the coasters until they are completely dry.
3. Ceramic tiles from your local home improvement store. I used 4″ by 4″ white tiles that cost $.10 a piece.
4. Decoupage Glue such as Modge Podge.
(If you are truly cash strapped, you can make your own decoupage glue with a mixture of flour and water, or water down white craft glue for the same effect http://www.ehow.com/way_5852511_diy-mod-podge-decoupage.html. You would however, need extra layers of varnish to ensure that they are waterproof)
5. Polyurethane or similar varnish
6. Exact-o-knife, scissors or razor
(I was fortunate to have a paper cutter, which makes for much easier execution)
7. Paper: Scrap Booking Paper, Card Stock, Colored Paper, Maps, Photographs, Love Letters, Magazine Cutouts; The list is endless. As long as it is made from paper, you can decoupage it.
8. Foam Brushes
9. Ruler
10. Sandpaper (optional)
11. Cork Board or Felt for bottom of coasters
12. Glue (if not using self adhesive cork)
Step 1. Take a precise measurement of your tile and cut your paper to be .25″ smaller. If you have 4″ x 4″ tiles, cut your paper to 3.75″ x 3.75″. I like to work in stages, so I cut all my paper at once.
Optional step: If you like, you can sand and paint the edges of the tile. (I had a few bottles of toxic-free white out that I used to paint the edges of the black and white tiles to give better contrast. I chose to leave the colored tiles unpainted, for a more natural look).
Step 2. Clean the tile to remove any particles (the original post recommends using rubbing alcohol).
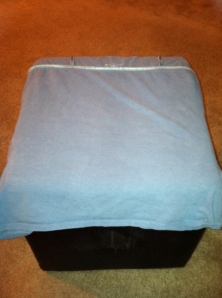
Step 3. Create a work surface (old t-shirt, towel etc.) Decoupage will stick to paper, as it is intended and can ruin your hard work if you are not careful. (I used an old t-shirt over an ottoman cover)
Step 4. Brush the tile with the decoupage glue, working in one direction. Try to get as close to the edges as possible.
Step 5. Using your fingers, start in the middle of the tile and the smooth the paper outward towards the edges (this should remove any air bubbles that may be trapped underneath).
Let dry approximately fifteen minutes
Step 6. Brush a second layer of decoupage across the tile. Keep in mind that the brush-strokes will be slightly visible when dry, so try to keep your lines as straight as possible. You can paint each layer in the same direction, or alternate directions creating a hatch-mark effect.
Let dry approximately fifteen minutes
Repeat this process until the paper is fully adhered. (I used two – three coats, depending on the thickness of the paper)
Step 7. Apply varnish. It is very important to make sure that you let each layer completely dry or will you will end up with air bubbles in your finished product.
Step 8. Attach the liner to the bottom of your tile. If you are fortunate enough to have found the cork shelf liner, just cut and peel. If you are using glue to adhere the cork or felt, I had the most success with rubber cement or heavy duty craft glue. Be sure to use these in well ventilated areas.
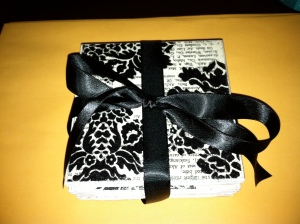
There are infinite ways to decorate your coasters. You can use stamps, stencils, ribbons, or paint. Sparkles and seashells, leather, satin or lace. The inspiration post shows beautiful, professional looking wrappings. As my coasters were not favors for an elegant affair but rather a small token of appreciation for the many special friends in my life; I chose ribbon. All in all, besides the “war against glue” and the space issues that arose from the project, they were a huge success. Happy crafting!!
And for all of you non-crafters, my handcrafted items are also available for purchase at www.warpeddna.com.


